____________________________________________________________________________
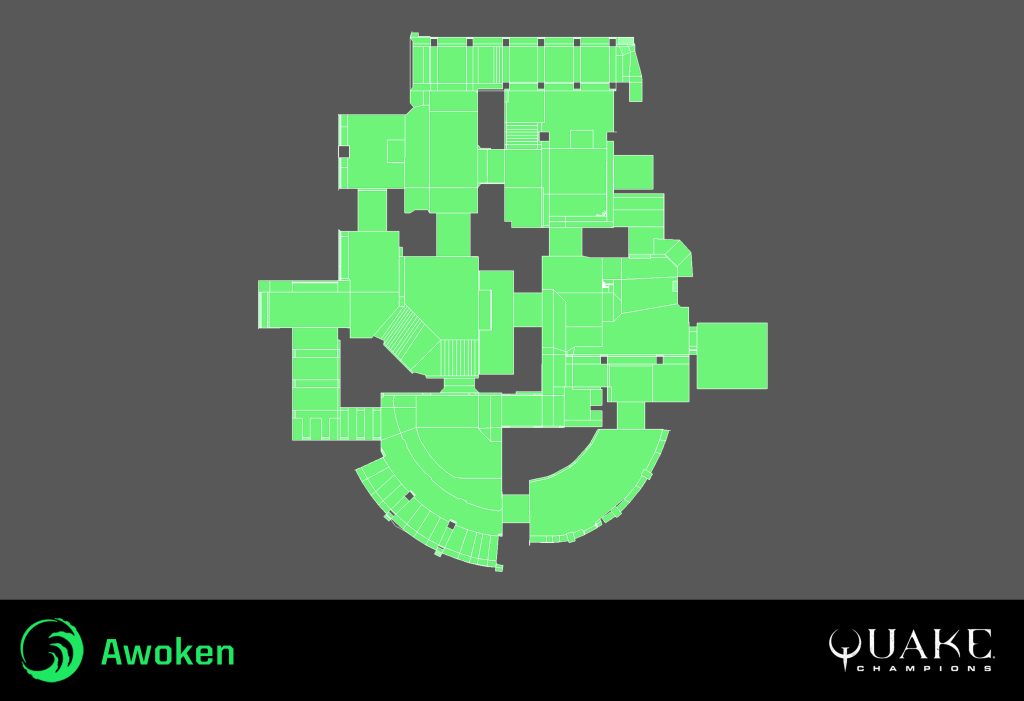
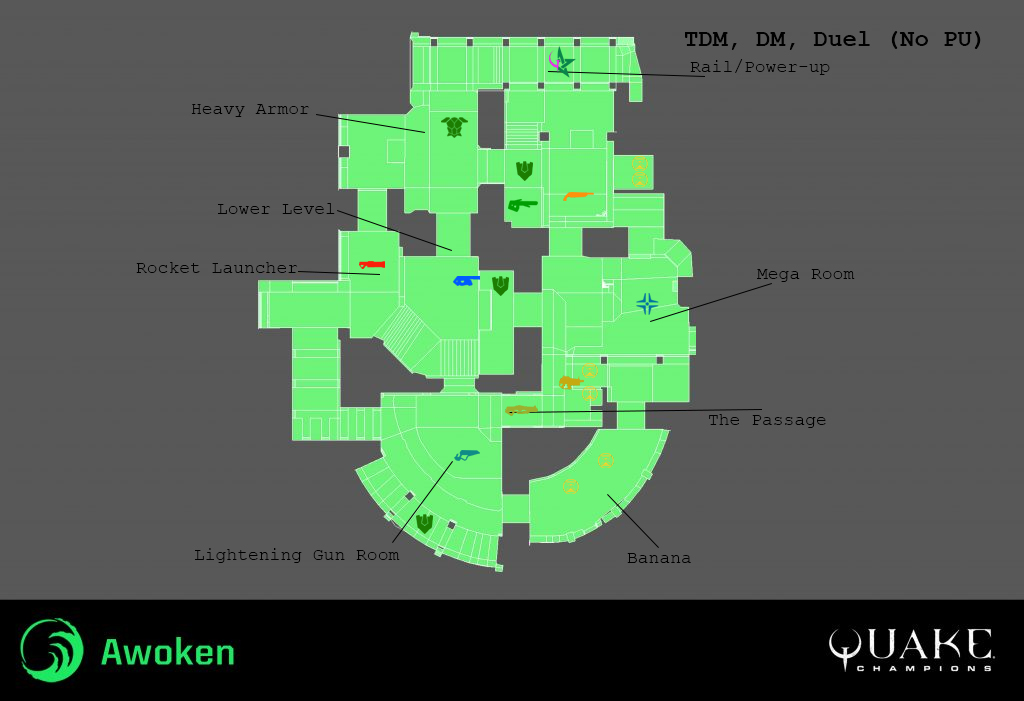
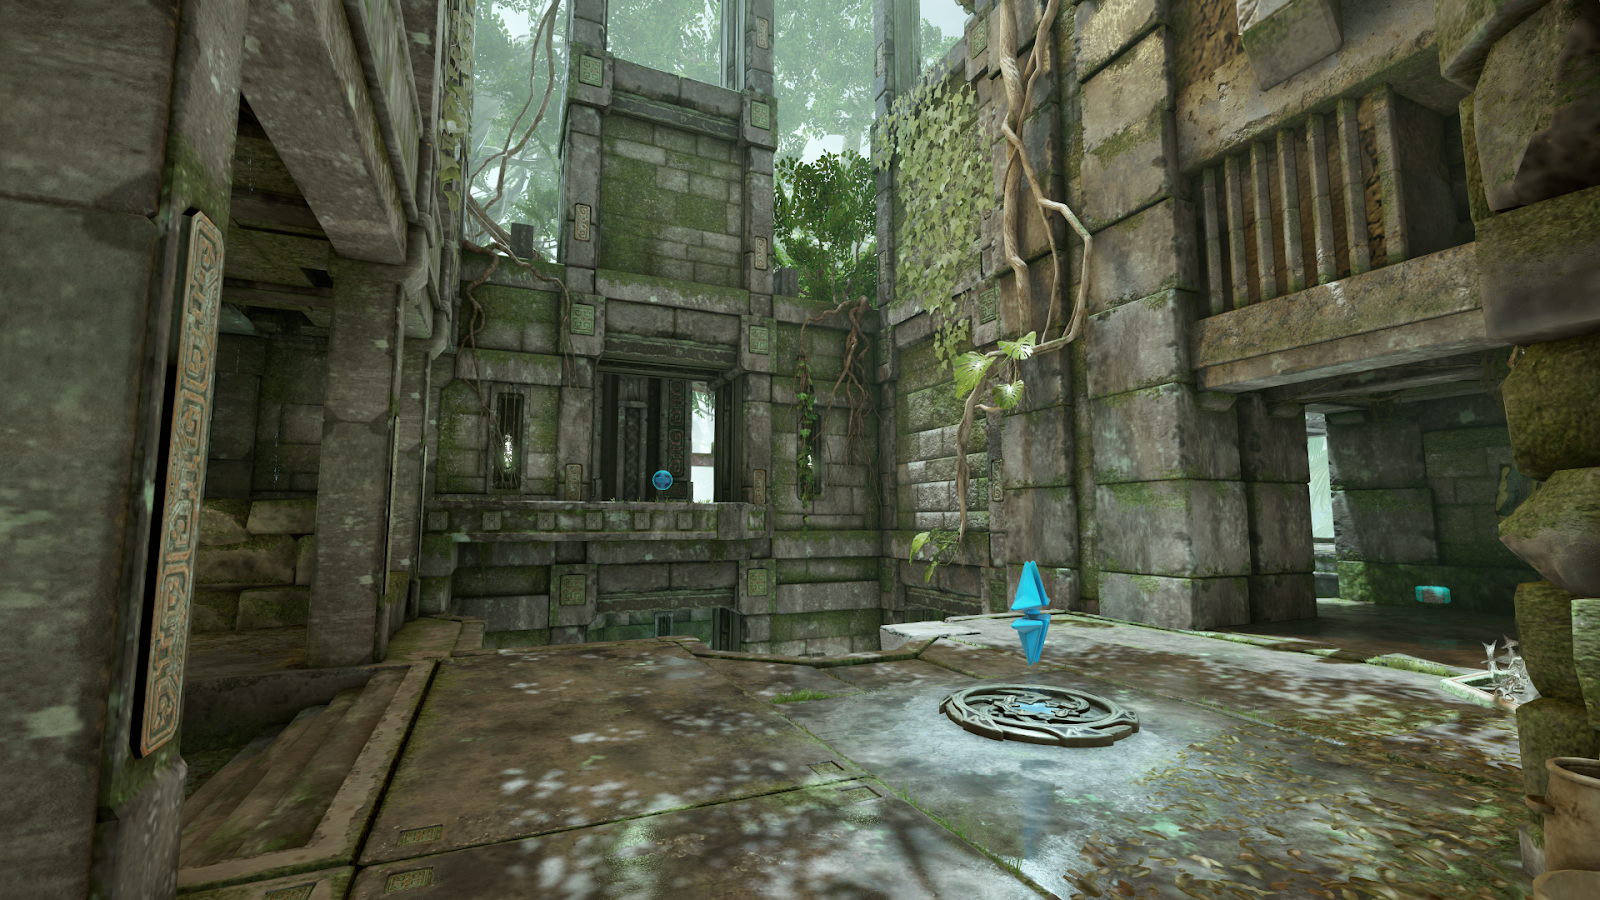
A beautiful visa and four landings slowly cascade inward with the Lightning Gun standing in the center of attention, the primary focus as you enter. This area offers a tricky ledge with the armor, health, and ammo spawns. Take the step up towards Light Armor carefully or you may get a ring-out. The columns may provide some cover, but one unlucky peek or a well placed rocket can easily send you flying into the swamp below. An upper balcony peeks over the room offering the Tri-Bolt spawn. The lower level gives the option to exit via the teleporter to the Rt Launcher area, a jump pad up to the Tri-Bolt, or a slippery escape into the lower passageway out. The mid level exits towards Banana and the Rocket Launcher room.
____________________________________________________________________________
Players can sludge their way through this watery lower passageway which connects the Lightning Gun room to the Mega area. This less frequented corner houses the Heavy Machinegun, two Hourglasses, and some nail ammo. Players will often use this spot as temporary cover and time their exit into the adjacent rooms, creating an opportunity for them to escape.
____________________________________________________________________________
This curved connection offers the player swift passage to and fro the Lightning Gun room to the Mega area. It can also offer a small reprieve with 2 health bubbles and 2 hour glasses, so you can get back into the action a little healthier.
____________________________________________________________________________
The Mega room is the half of the center of the map. With easy access to each other part of the map. The Mega Health spawns on the mid level. The waterfall behind the mega offers a small hide spot for strogg. The balcony is accessible with a double jump through the fallen blocks. The side paths go to the Railgun room, and the Banana. Lower level has a jump pad to the mega and easy routes to the Rocket Launcher room, lower Railgun room, and the Passage.
(I counted the Ammo box on balcony, and Next to Well)
____________________________________________________________________________
The Railgun spawns on the upper part of this room with stairs down to the power-up platform. The lower level offers a small armor, with a jump pad access to the mid level. For TDM and DM games the power-up platform is a huge spot of strife. The pillars are a fun way to try to keep cover and maneuver your way to control, but the risk of a ring-out is pretty high with an open ledge around the power-up.
____________________________________________________________________________
As a major contention point, this room sees a lot of fragging. The Heavy Armor spawns in the flooded lower area and can be dropped down on from the shared mid-level with the power-up area, the balcony near the Rai gun, and the midlevel coming from the Rocket Launcher. It also has a window at lower level to the lower part of the Railgun room. For such a small area this item is a high risk grab.
____________________________________________________________________________
The center of the map is split in two with one side being the dramatic staircase from Rocket Launcher spawn and teleporter exit to the balcony that leads to the Mega room. This half of the map is heavy with activity on three levels. The flooded lower level, the Rocket Launcher spawn with a hallway to the lightning gun room, and a doorway to the heavy armor mid level.
____________________________________________________________________________
Located on the lowest level of each room, this area reaches each part of the map. The flooded waters give little cover to your movements, but makes up for it with health bubbles. For an ease cut from one room to another this area is best to use quickly and get back up to less troubled waters.
____________________________________________________________________________
The upper most part of Awoken is split into two sections. One gives the upper hand to the Rocket Launcher room and Mega area. The other is over the Railgun/power-up room and the Heavy Armor area. So while this upper area is a great strategic point to play, you must leave it to control both major items.
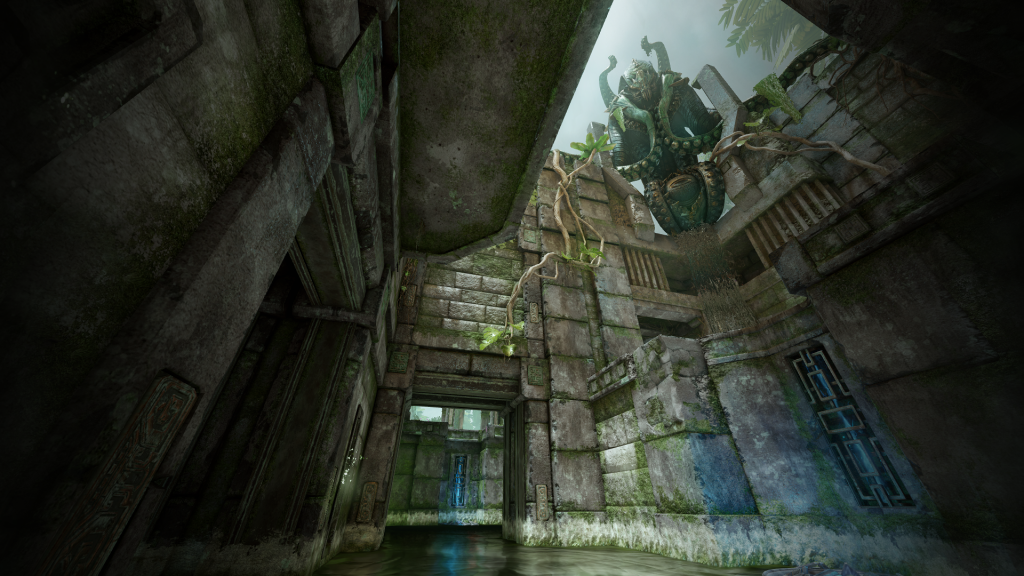 In the vine-choked valleys beyond Zar’s templed terraces, a monument to the Queen of Ciphers looms over what remains of the Temple of Forgetting.


 Located on the lowest level of each room, this area reaches each part of the map. The flooded waters give little cover to your movements, but makes up for it with health bubbles. For an ease cut from one room to another this area is best to use quickly and get back up to less troubled waters.